Working with Tasks
Tasks are an important part of using Whiteboard. The campaigns in your Playbook will assign tasks for you to make phone calls and send notes to your clients and partners. That way, you don’t have to keep up with it in a calendar somewhere. You can also create tasks manually for a future date.
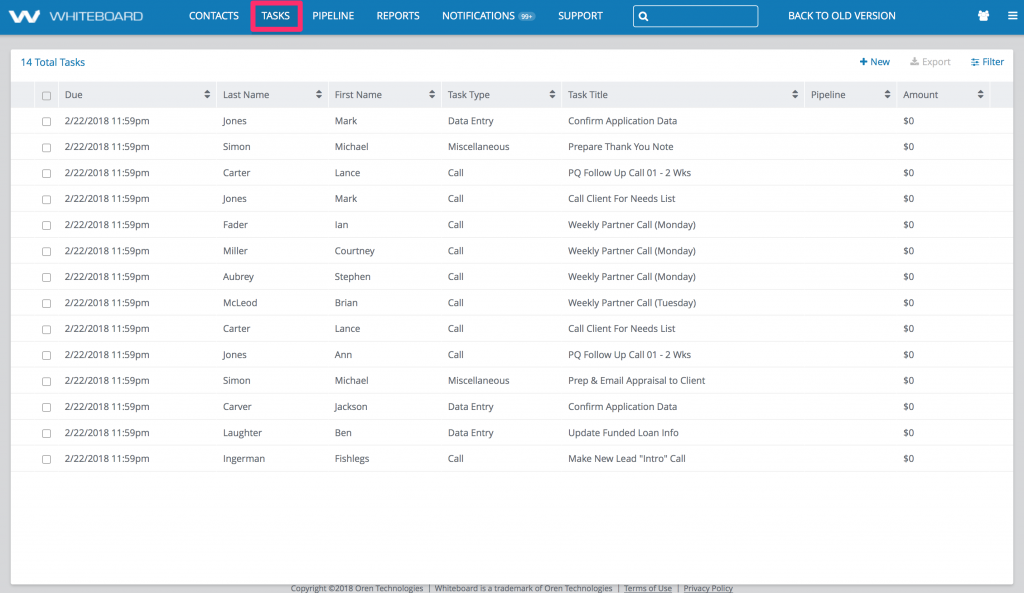
If you’re going to knock out a bunch of tasks at once, this article will help you learn how to navigate around in the Tasks view, accessible from the top navigation bar.
You can also accomplish tasks from directly within a Client or Partner record.
Tasks View
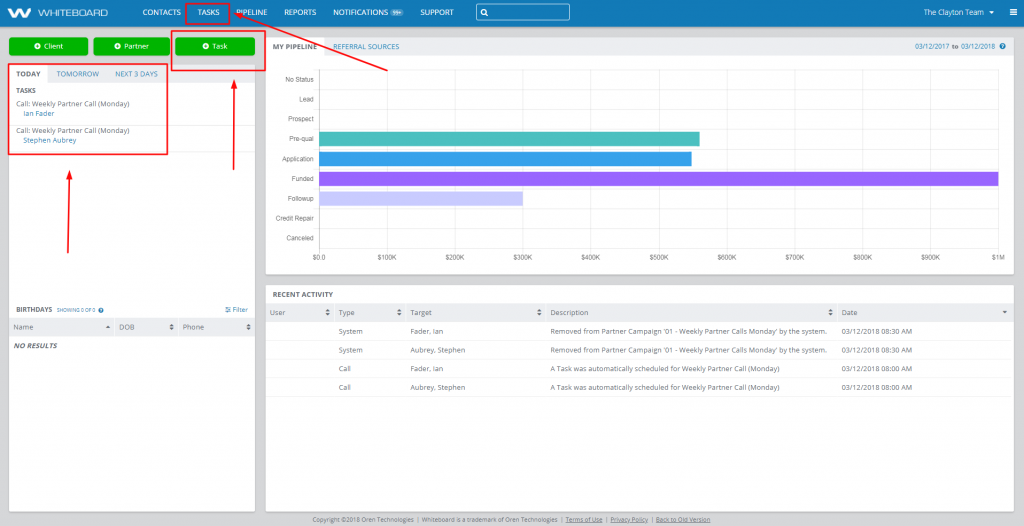
Logging in every day and completing your tasks is a major way to stay ahead with Whiteboard. You can easily access any task generated for you or team by selecting the Tasks tab from the Dashboard view.

Add a new task directly from the Dashboard view by selecting the green “Task” Button on the upper left-hand side of the dashboard view.

Additionally, the Today, Tomorrow and Next Three Days options control both your Task and Birthday views.
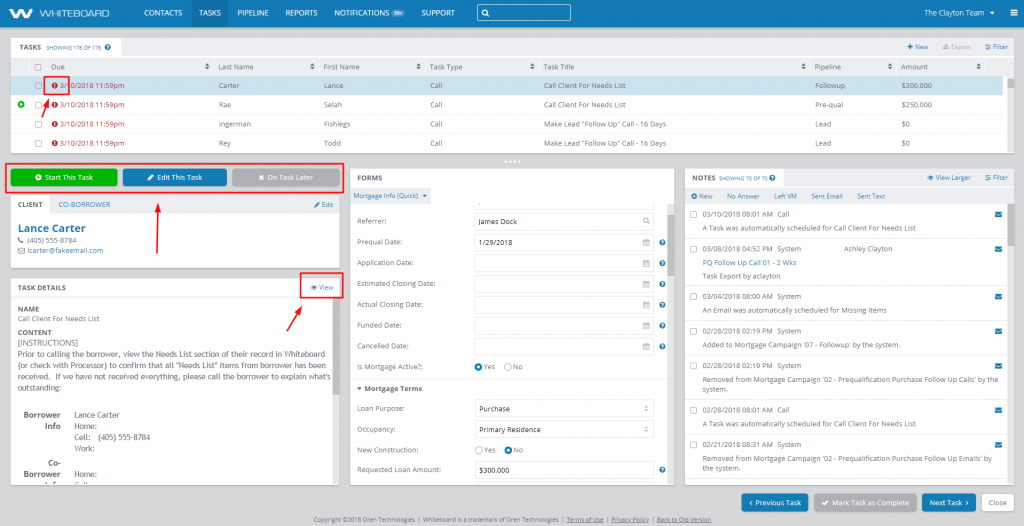
After opening your task view, you will notice a few different tabs in various colors. Let’s go over those, we will move from left to right –

- If a task is red, that simply means that it was generated by Whiteboard more than 24 hours ago.
- Starting a Task does not mean the task needs to be completed immediately, or that there is a timer going. It simply means that you (as an individual) have claimed this task for yourself.
- Edit This Task allows you to edit task details such as: (priority, task name, action type)
- Selecting View will produce a full look at the individual task information.
- Previous Task simply allows you to toggle to the prior task.
- Mark Task as Complete signifies that the task is done – a green check-mark will appear next to the task, and it will be cleared from the task view.
- Next Task permits you to switch to the following task.

- After Starting a Task, you will be asked to Claim the Task. Just to re-iterate, that means that you are claiming this task for yourself and another member of your team cannot.
- Whiteboard will ask you if you would like to add a custom note about your interaction after completing a a task. This is optional – when you are finished with this window, select Complete Task.

- If you are not ready to claim a task or complete a task and accidentally open either of these windows, you can simply select Cancel.
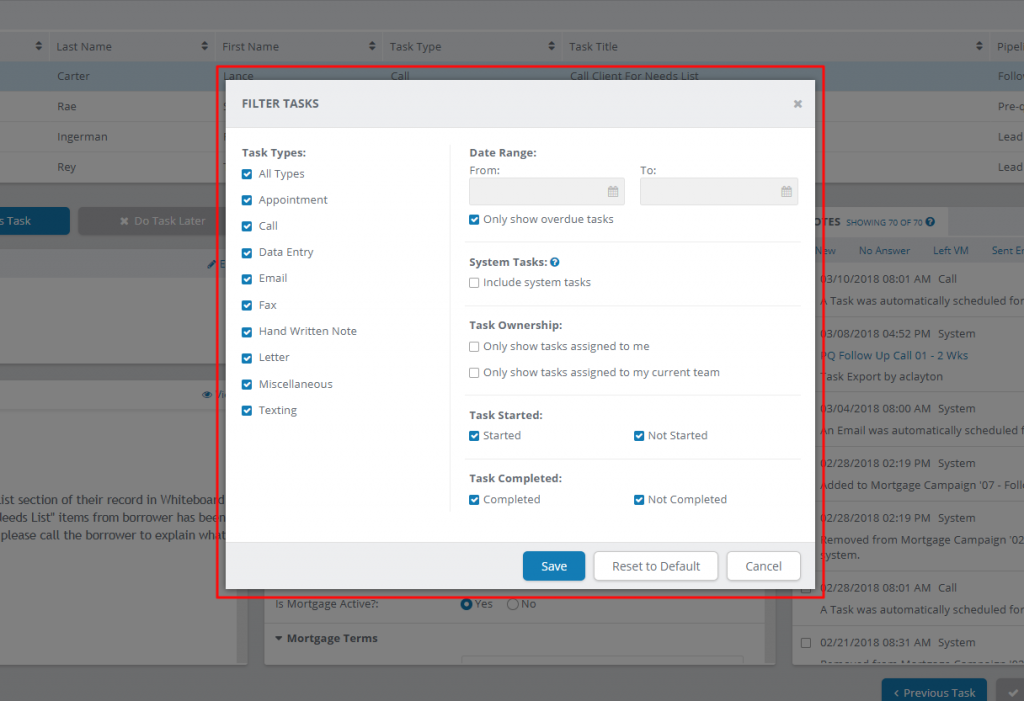
By selecting Filter from the Tasks view, this Filter Tasks view that you see above will populate.

This popup allows you to select what kind of tasks appear on the Tasks page. Filter Tasks settings are saved and apply each time you come back to the page, so be sure to check here first if you aren’t seeing the tasks you expected to.
Once you’ve made any changes you want within the pop-up, clicking Save will apply those changes and refresh the Tasks page.
By selecting New from the Tasks view, a pop up window like the one you see below will automatically generate.

PRIORITY
Select a priority level for the task. This changes the generated task’s appearance on the Tasks page.
ACTION TYPE
Select what type of action the task will be. This list is a default of the action types provided by Whiteboard, but you can add more from your Office Settings tab.
DESCRIPTION
Give your task a description – be detailed!
TASKED FOR
Select who will be responsible for completing the task. You can choose between yourself, a member of the office, teams in the office, a team member, or a team role.
SET REMINDER
Selecting this checkbox will show the “Remind Me” dropdowns that cause the system to generate a reminder notification before the task is scheduled to start.
CLIENT
Start typing in a client’s name to make them auto-populate from the list of clients on your team. If you select a client, the “Mortgage” drop-down will populate with any Mortgages that are associated with that Client to allow you to further narrow down what information the task applies to.

